To create a BOQ for interior design: list every work item room by room, specify materials and finishes, measure quantities, apply unit rates, add labour and overheads, and total with taxes. Done well, the same BOQ becomes your client quotation, your purchase plan and your cost baseline. Here is the seven-step process used by professional firms, with an Indian residential example.
What is BOQ in interior design?
A BOQ (Bill of Quantities) is a structured list of all materials and work items in a project with units, quantities, rates and totals that serves as the commercial contract between designer, client and vendors. It is what you quote from, purchase against, and settle vendor bills against.
Step 1 - Start from frozen drawings
A BOQ built on a moving design is fiction. Lock layouts, finishes and electrical drawings first every revision to the design after the BOQ is priced becomes a repricing exercise, and every unpriced revision becomes a dispute. If the client is still deciding between two kitchen layouts, price both as options rather than guessing.
Step 2 - Structure room by room
Living room, kitchen, bedrooms, bathrooms, common areas clients read BOQs spatially, and room-wise structure makes revisions and phase-wise execution easier. It also makes omissions visible: an empty "balcony" section prompts the question, while a flat item list hides what's missing.
Step 3 - Break each room into work categories
Use the standard trade sequence inside each room: civil and demolition, electrical, plumbing, false ceiling and POP, carpentry and modular, wall and floor finishes, soft furnishings and décor. This order mirrors how the site will actually be executed, which makes the BOQ double as an execution checklist.
Step 4 - Measure quantities in the right units
Square feet for finishes, panelling and ceilings; running feet for counters, ledges and mouldings; numbers for fixtures, points and appliances; lump sum only where measurement is genuinely impossible. Wrong units are the #1 source of BOQ disputes a wardrobe priced per sq ft of shutter reads very differently from one priced per running ft of carcass.
Step 5 - Specify materials, makes and finishes per line
"Laminate" is a dispute waiting to happen; "Merino 1mm laminate, matt, shade as approved sample" is a specification. Name the make, grade, thickness and finish for every significant material. Specification is also your protection at billing time: what was quoted is demonstrably what was installed.
Step 6 - Apply rates, margins and GST
Maintain cost rate and selling rate per item; apply the correct GST rate per category; check totals twice formula errors in Excel BOQs silently destroy margins. Keep labour visible, either inside item rates or as separate lines, and state clearly what overheads and design fees include so the client isn't surprised later.
Step 7 - Version-control every revision
Name and date every version, record what changed and why, and get client sign-off on the final version before purchase orders are raised. The signed version is the contract; every later change request is priced against it. If your BOQ lives in Excel, this is where it breaks by V5 nobody is sure which file the client approved.
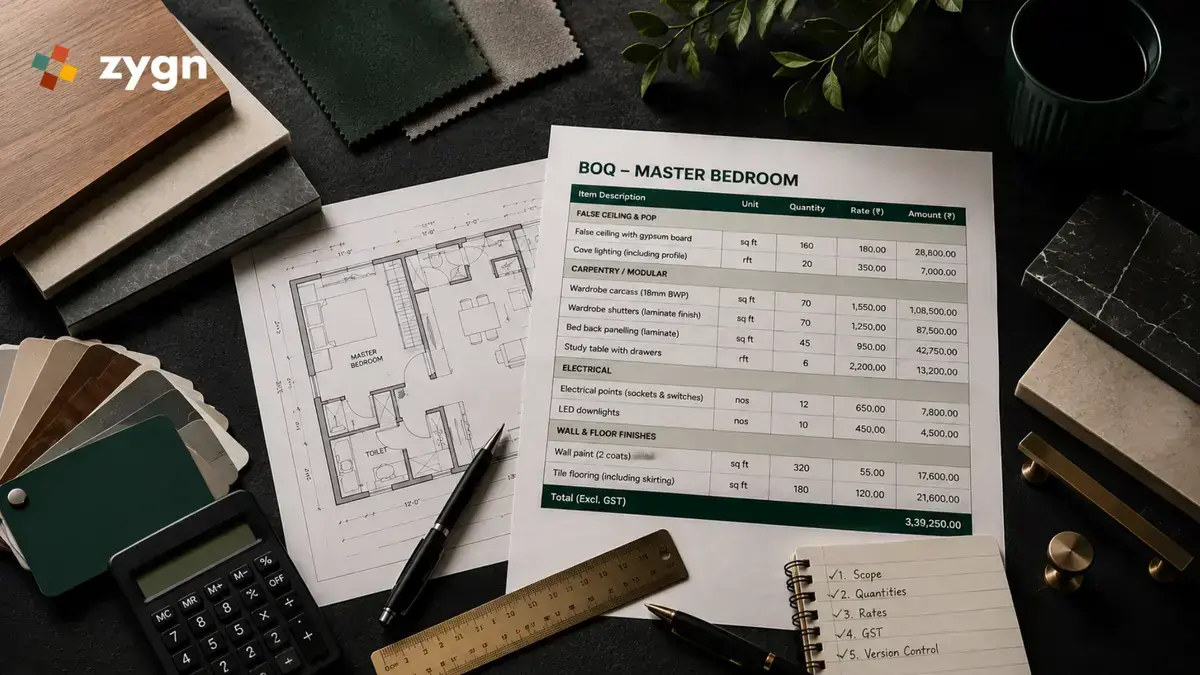
Sample BOQ structure - Master Bedroom
| Item | Unit | Qty | Rate (₹) | Amount (₹) |
|---|---|---|---|---|
| Gypsum false ceiling with paint | sq ft | 140 | 95 | 13,300 |
| Wardrobe - carcass + shutters (Merino 1mm laminate) | sq ft | 84 | 1,450 | 1,21,800 |
| Bed back panelling with ledge | sq ft | 48 | 850 | 40,800 |
| Electrical points (5A/15A, switches) | nos | 14 | 750 | 10,500 |
| Painting - walls & ceiling (Asian Paints Royale) | sq ft | 520 | 38 | 19,760 |
Excel vs BOQ software
Excel works until the third revision or the second parallel project; then version chaos and re-typing into POs start costing real money. BOQ software keeps item libraries, versions and purchase orders connected approved quantities flow to procurement without a single re-type. (